Introduction
Japanese cuisine has captured the hearts and palates of food enthusiasts around the world, celebrated for its harmony of flavors, aesthetics, and techniques. Among the myriad of dishes that define this culinary landscape, katsu stands out as a beloved favorite. Originating from the need to adapt Western culinary influences into Japanese culture, katsu epitomizes the perfect balance of crispy texture and savory flavor, making it a staple in homes and restaurants alike.
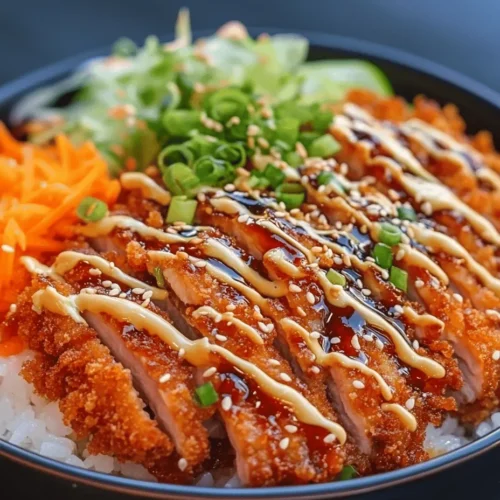
Katsu, which translates to “cutlet,” typically consists of breaded and deep-fried meat, most commonly pork or chicken. Served over rice and accompanied by a rich sauce, katsu bowls elevate this dish into a complete meal that appeals to both the eyes and the taste buds. The comforting combination of tender, juicy meat and crisp breadcrumbs served over a bed of fluffy rice creates a satisfying dish that fills the stomach and warms the soul.
One of the crucial components that make katsu bowls truly delightful is the homemade tonkatsu sauce. This rich, tangy sauce enhances the flavors of the katsu while adding depth to the overall dish. A well-prepared tonkatsu sauce transforms a simple meal into an extraordinary dining experience, making it worth the effort to create your own from scratch.
Understanding Katsu: A Culinary Delight
Katsu’s roots can be traced back to the late 19th century during the Meiji era, when Japan began to modernize and adopt Western culinary techniques. The dish evolved from the French “côtelette” and soon became a fixture in Japanese cuisine, taking on its unique character. Traditionally, katsu is made using pork (tonkatsu), though variations include chicken (chicken katsu) and even vegetarian options using eggplant or tofu, catering to diverse dietary preferences.
The hallmark of katsu lies in its use of panko breadcrumbs, which are essential for achieving that signature crispiness. Unlike regular breadcrumbs, panko is made from crustless white bread that is coarsely ground, resulting in larger, airy flakes. This unique texture allows for a lighter, crunchier coating when fried, providing the perfect contrast to the juicy meat inside. The use of panko is a defining characteristic of katsu and is essential in replicating that restaurant-quality crunch at home.
Ingredients Breakdown: What You Need for Katsu Bowls
Creating delicious katsu bowls at home requires a selection of fresh ingredients that contribute to the dish’s overall flavor and texture. Below is a detailed list of what you will need for both the katsu and the homemade tonkatsu sauce.
For the Katsu:
– Pork Chops or Chicken Breasts: The star of the dish, choose bone-in or boneless pork chops for tenderness or opt for chicken breasts for a lighter option.
– Panko Breadcrumbs: Essential for that crispy coating. Make sure to choose high-quality panko for the best texture.
– All-Purpose Flour: This acts as the first layer of coating, allowing the egg wash to adhere better to the meat.
– Eggs: Beaten eggs will help the panko breadcrumbs stick to the meat, resulting in a perfectly coated cutlet.
– Salt: A basic seasoning that enhances the flavor of the meat.
– Black Pepper: Adds a hint of spice to balance the richness of the dish.
– Vegetable Oil: For frying the katsu, choose an oil with a high smoke point, such as canola or sunflower oil.
For the Tonkatsu Sauce:
– Ketchup: Provides the base and a hint of sweetness.
– Worcestershire Sauce: Adds depth and umami flavor.
– Soy Sauce: Contributes a savory saltiness to the sauce.
– Sugar: Balances out the acidity of the ketchup and adds a touch of sweetness.
– Dijon Mustard: For a subtle tang and added complexity.
– Mirin: A sweet rice wine that enhances the overall flavor profile.
– Ground Ginger and Garlic: These aromatics add warmth and depth to the sauce.
Importance of Each Ingredient
Each ingredient plays a crucial role in achieving the desired flavor and texture of katsu bowls. The choice of meat determines the richness of the dish, while panko breadcrumbs are key to that coveted crunch. The flour and egg create a perfect binding layer for the breadcrumbs, ensuring they adhere well during frying.
For the tonkatsu sauce, a balance of sweet, savory, and tangy flavors is essential. The combination of ketchup, Worcestershire sauce, and soy sauce creates a complex flavor that complements the fried cutlet beautifully. The addition of spices like ginger and garlic elevates the sauce further, making it an indispensable part of the dish.
When sourcing ingredients, consider visiting local Asian markets or specialty grocery stores for authentic Japanese products. This ensures that the flavors remain true to their origins, enhancing the overall experience of your katsu bowls.
Making Homemade Tonkatsu Sauce
Creating your own tonkatsu sauce at home is simple and rewarding. While store-bought versions exist, nothing compares to the freshness and flavor of homemade sauce. Below is a step-by-step guide to preparing this essential condiment.
Step-by-Step Guide to Preparing Tonkatsu Sauce
1. Gather Ingredients: Start by measuring out all the necessary ingredients: ketchup, Worcestershire sauce, soy sauce, sugar, Dijon mustard, mirin, ground ginger, and garlic.
2. Mix the Base Ingredients: In a mixing bowl, combine 1/2 cup of ketchup, 2 tablespoons of Worcestershire sauce, and 1 tablespoon of soy sauce. Stir well until fully blended.
3. Add Sweetness and Flavor: Incorporate 2 tablespoons of sugar, 1 teaspoon of Dijon mustard, and 1 tablespoon of mirin into the mixture. These ingredients will enhance the depth of flavor and provide a balanced sweetness.
4. Spice It Up: Finally, add 1/2 teaspoon of ground ginger and 1/2 teaspoon of ground garlic. Mix until all ingredients are well combined.
5. Taste and Adjust: Taste the sauce and adjust the sweetness or acidity according to your preference. If you prefer a tangier sauce, consider adding a bit more Worcestershire sauce or a splash of vinegar.
6. Store: Transfer the sauce to an airtight container and refrigerate. The flavors will meld and improve over time, making it even better when you use it later.
Discussion on the Balance of Flavors
The beauty of tonkatsu sauce lies in its harmonious balance of flavors. The sweetness from the ketchup and sugar counters the savory notes from the soy sauce and Worcestershire sauce, while the mustard adds a slight kick. Mirin contributes a subtle sweetness and depth, making the sauce complex yet approachable.
For those looking to experiment, variations of tonkatsu sauce can be made by incorporating additional spices or even citrus zest for a refreshing twist. If you’re unable to find certain ingredients, feel free to make substitutions; for example, apple cider vinegar can replace mirin in a pinch, although the flavor will differ slightly.
Preparing the Pork Chops: A Key to Crispy Katsu
The success of your katsu bowls hinges largely on the preparation of the pork chops. Selecting the right cut and properly preparing the meat ensures a tender and flavorful result.
Tips on Selecting the Right Cut of Pork
When choosing pork chops for katsu, look for well-marbled cuts. Bone-in chops tend to have more flavor and juiciness, but boneless chops are easier to handle and cook more evenly. Ensure that the chops are of uniform thickness, ideally around 1 inch, to promote even cooking.
Importance of Pummeling the Pork
Before breading, it is advisable to pound the pork to an even thickness. This step not only tenderizes the meat but also ensures that it cooks uniformly, preventing dryness. Use a meat mallet or rolling pin to gently pound the pork, being careful not to tear the meat.
Seasoning Tips
Seasoning the pork is crucial for enhancing the flavor of your katsu. A simple mixture of salt and black pepper is often sufficient, but feel free to add a touch of garlic powder or paprika for additional flavor. Let the seasoned meat rest for about 15-20 minutes before breading to allow the flavors to penetrate the meat.
With these preparations in place, you are now ready to move on to the art of breading and frying, which will culminate in the creation of your crispy Japanese katsu bowls.
Stay tuned for the next part of this article, where we will delve into the techniques required to achieve perfectly breaded and fried katsu, ensuring a satisfying meal that captures the essence of Japanese cuisine.

Detailed Instructions for Setting Up a Breading Station
Creating a breading station is critical for achieving that classic crispy texture in your Japanese katsu bowls. A well-organized setup will streamline the process and ensure that your katsu turns out perfectly every time.
1. Gather Your Ingredients:
Before you begin, make sure you have all your ingredients ready. You will need:
– All-purpose flour
– Large eggs, beaten
– Panko breadcrumbs (Japanese-style breadcrumbs)
– Salt and pepper for seasoning
2. Set Up Your Station:
Designate three shallow bowls or plates for the breading process:
– First Bowl: Fill with flour seasoned with a pinch of salt and pepper. This will help the egg adhere to the meat.
– Second Bowl: Pour in the beaten eggs, which will act as the binding agent for the breadcrumbs.
– Third Bowl: Place the panko breadcrumbs. To enhance flavor, consider mixing in some additional seasoning, like garlic powder or paprika.
3. Prepare Your Protein:
Start with your choice of meat, typically chicken or pork. Slice the meat to an even thickness, about ½ inch, to ensure it cooks evenly. For chicken, boneless thighs or breasts work well, while pork can be made using loin or tenderloin.
Techniques for Achieving the Perfect Breading
1. Dredging in Flour:
Begin by taking your meat and coating it evenly in the seasoned flour. Make sure to shake off any excess flour; you want a light coating that will allow the egg to stick.
2. Bathing in Egg:
Next, dip the floured meat into the beaten egg, ensuring it is fully coated. The egg should cling well, forming a sticky layer that will hold the panko.
3. Coating with Panko:
Finally, press the meat into the panko breadcrumbs, ensuring an even and thorough coating. Gently press down to help the breadcrumbs adhere. For an extra crunch, double-dip the meat back into the egg and then into the panko again.
Frying Tips to Achieve a Crispy Exterior Without Excessive Oil Absorption
Frying the katsu properly is essential for creating that golden-brown, crispy exterior without excessive oil absorption. Here are some tips:
1. Use the Right Oil:
Choose an oil with a high smoke point, such as vegetable oil or canola oil. This will allow you to fry at high temperatures without burning the oil.
2. Preheat the Oil:
Heat your oil in a deep skillet or frying pan until it reaches about 350°F (175°C). You can test if the oil is hot enough by dropping a few breadcrumbs into it; if they sizzle and rise to the surface, the oil is ready.
3. Fry in Batches:
Avoid overcrowding the pan, as it can lower the oil temperature and lead to soggy katsu. Fry one or two pieces at a time, cooking for about 3-4 minutes on each side until golden brown.
4. Drain Excess Oil:
Once cooked, transfer the katsu to a wire rack or a plate lined with paper towels to drain any excess oil. This step is crucial for maintaining crispiness.
Assembling the Katsu Bowls
Once your katsu is fried to perfection, it’s time to assemble your bowls.
1. Layering the Ingredients:
Begin with a serving of steamed rice at the bottom of your bowl. The rice serves as a foundation for the katsu, absorbing the delicious flavors from the other ingredients.
2. Adding the Katsu:
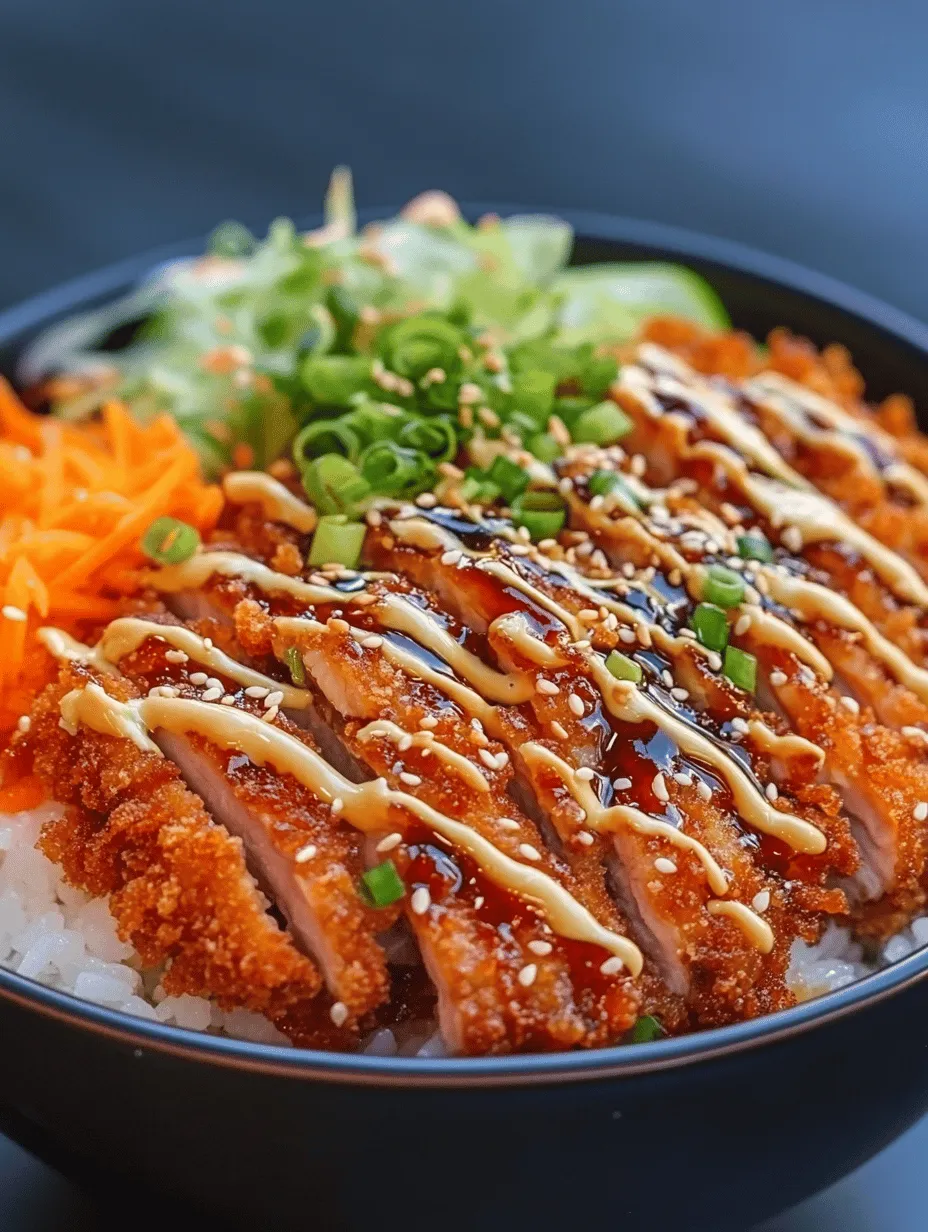
Slice the cooked katsu into strips and lay them atop the rice. The presentation matters, so arrange them neatly to show off that crispy exterior.
3. Incorporating Vegetables:
Add a variety of vegetables for color and nutrition. Sliced cucumbers, shredded cabbage, or pickled vegetables add freshness and crunch. You can also include steamed broccoli or carrots for additional nutrients.
4. Importance of Presentation:
A visually appealing bowl is more enticing. Use contrasting colors and textures to create a vibrant dish. The array of colors not only makes the bowl look more appetizing but also enhances the overall dining experience.
Garnishing Your Katsu Bowls for Maximum Flavor
Garnishes can elevate your katsu bowls, both in flavor and presentation.
1. Role of Garnishes:
Fresh garnishes like chopped green onions add a pop of color and a burst of flavor. Sesame seeds can introduce a nutty taste and crunch, while pickled ginger provides a refreshing contrast to the rich katsu.
2. Enhancing Visual Appeal:
Consider adding a sprinkle of shichimi togarashi, a Japanese seven-spice blend, to introduce a hint of spice and further enhance the visual appeal.
3. Optional Garnishes:
Additional garnishes can include:
– Microgreens for a fresh touch
– Seaweed strips for an umami kick
– A drizzle of tonkatsu sauce over the katsu for added flavor
Serving Suggestions and Pairings
Pairing your katsu bowls with the right sides can enhance the meal.
1. Ideal Side Dishes:
Traditional side dishes that complement katsu bowls include miso soup, which adds warmth and depth, and a simple salad with a light dressing. Edamame sprinkled with sea salt also makes for a nutritious side.
2. Cultural Context:
In Japan, katsu bowls are often enjoyed in casual dining settings, making them perfect for family meals or gatherings with friends. It’s a dish that brings comfort and satisfaction, embodying the essence of home cooking.
3. Meal Prep and Storing Leftovers:
If you have leftovers, store the katsu and rice separately to maintain their textures. Reheat in the oven to retain crispiness, and consider freshening up the vegetables before serving.
Nutritional Information: A Balanced Meal
Katsu bowls can be a balanced meal when prepared thoughtfully.
1. Nutritional Profile:
A typical katsu bowl provides protein from the meat, carbohydrates from the rice, and essential vitamins from the vegetables. Depending on the meat choice, the dish can be quite filling and satisfying.
2. Portion Sizes and Dietary Considerations:
Be mindful of portion sizes, particularly the rice and fried katsu, to maintain a balanced meal. For those watching their calorie intake, consider using brown rice or cauliflower rice as a healthier alternative.
3. Making the Dish Healthier:
To reduce calories without sacrificing flavor, try oven-baking the katsu instead of frying. You can still achieve a crispy texture by using a light spray of oil and ensuring an even coating of panko.
Conclusion
Crispy Japanese katsu bowls are a delightful fusion of flavors, textures, and colors that can be enjoyed at any time. They offer a satisfying crunch, a savory depth from the tonkatsu sauce, and endless possibilities for customization. Whether you’re experiencing the joy of cooking for the first time or are a seasoned chef looking to expand your culinary repertoire, making katsu at home is a rewarding adventure.
So, gather your ingredients, set up your breading station, and embark on a delicious journey into the heart of Japanese cuisine. As you savor each bite, remember the joy of sharing this dish with family and friends, creating lasting memories over a comforting bowl of katsu. Embrace the art of cooking, and enjoy the flavorful experience that comes with each homemade katsu bowl.