Introduction
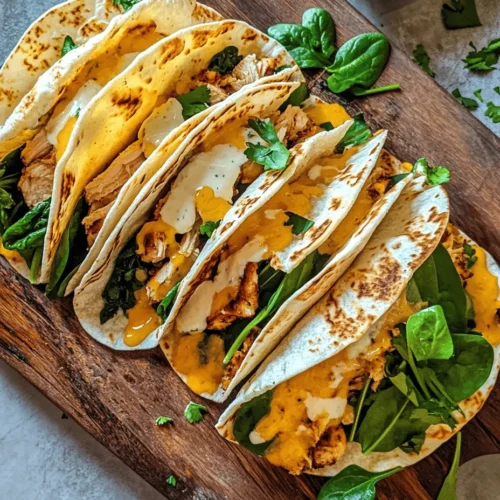
If you’re in search of a dish that combines convenience, flavor, and nutrition, look no further than Cheesy Garlic Chicken Wraps. This delightful recipe has gained popularity among home cooks and busy families alike, thanks to its enticing combination of savory flavors and a satisfying texture. The wrap encapsulates perfectly seasoned chicken, melty cheeses, and aromatic garlic, all nestled in a soft tortilla. It’s a meal that promises to tantalize your taste buds while being easy to prepare.
Wraps are not just versatile—they’re a culinary canvas that allows you to experiment with different flavors and ingredients. Whether you’re preparing a quick lunch, a satisfying dinner, or even a snack for a gathering, these wraps can be customized to suit your taste preferences. The balance of cheesy richness, garlicky goodness, and tender chicken makes these wraps a favorite among both adults and children. With minimal prep time and a quick cooking process, Cheesy Garlic Chicken Wraps are a go-to option for anyone looking to enjoy a hearty meal without spending hours in the kitchen.
Understanding the Ingredients
To create the perfect Cheesy Garlic Chicken Wraps, it’s essential to understand the roles of each ingredient in this delicious dish. The following key components come together to form a harmonious blend of textures and flavors:
Chicken Breasts
At the core of this recipe is chicken breasts, which serve as the primary source of protein. Chicken is known for its versatility and ability to absorb flavors well, making it an ideal choice for this wrap. When properly seasoned and cooked, chicken breasts can yield a juicy, tender texture that elevates the entire dish. Opting for skinless, boneless chicken breasts simplifies the preparation process and ensures a healthier option.
Cheeses
A blend of cheeses is vital to achieving the creamy, cheesy goodness that defines these wraps. Cheddar and mozzarella are the stars here, each contributing unique qualities. Cheddar brings a sharp, tangy flavor, while mozzarella adds a luxurious creaminess that melts beautifully. This combination creates a delightful contrast that enhances the overall taste and texture, ensuring every bite is packed with cheesy delight.
Garlic
Garlic is the unsung hero of this recipe, infusing the chicken and wrap with its aromatic essence. Not only does garlic enhance the flavor profile, but it also adds a depth that complements the richness of the cheeses. Given its health benefits—such as boosting the immune system and possessing anti-inflammatory properties—garlic is not just flavor-enhancing but also a nutritious addition to your meal.
Tortillas
The foundation of any wrap is the tortilla, and for this recipe, you’ll want to choose tortillas that are soft yet sturdy enough to hold the filling. Flour tortillas are a popular choice due to their pliability, but corn tortillas can also be used for a gluten-free option. The tortilla wraps everything together, making it easy to eat while on the go.
Spinach
Adding fresh spinach to your Cheesy Garlic Chicken Wraps not only boosts the nutritional value but also adds a pop of color and freshness. Spinach is rich in vitamins and minerals, making your meal not only delicious but also healthy. Its mild flavor complements the other ingredients without overpowering them, allowing the cheesy and garlicky notes to shine through.
Optional Ingredients
While the core ingredients create a fantastic wrap, you can elevate the flavor with optional ingredients such as ranch dressing, hot sauce, or even diced tomatoes. Ranch dressing can add a creamy tang that pairs wonderfully with the savory chicken and garlic. Hot sauce can enhance the dish with a spicy kick, perfect for those who enjoy a bit of heat. Diced tomatoes or sliced avocados can introduce additional freshness and texture, making the wraps even more appealing.
Step-by-Step Guide to Making Cheesy Garlic Chicken Wraps
Now that we’ve explored the essential ingredients, let’s dive into the step-by-step process of making Cheesy Garlic Chicken Wraps. This guide will help you prepare the dish efficiently while ensuring that every component is perfectly executed.
Preparing the Chicken
The first step in creating Cheesy Garlic Chicken Wraps is preparing the chicken. Start with fresh or thawed chicken breasts to ensure even cooking.
1. Seasoning the Chicken: Season the chicken breasts generously with salt, pepper, and any additional spices you prefer, such as paprika or Italian seasoning. Proper seasoning is crucial as it enhances the flavor of the chicken, making it a star player in the wrap.
2. Cooking Techniques: There are various ways to cook the chicken, including grilling, baking, or pan-searing. For this recipe, pan-searing is an excellent choice, as it allows for a nice sear on the outside while keeping the inside juicy.
3. Cooking the Chicken: Heat a skillet over medium-high heat and add a splash of olive oil. Once the oil is hot, carefully place the seasoned chicken breasts in the skillet. Cook for about 6-7 minutes on each side, depending on the thickness, until the chicken is cooked through and has reached an internal temperature of 165°F (75°C).
4. Resting the Chicken: After cooking, allow the chicken to rest for a few minutes. This step is essential as it helps the juices redistribute throughout the meat, ensuring your chicken remains moist and flavorful.
Creating the Garlic Mixture
While the chicken is cooking, it’s time to prepare the garlic mixture that will elevate the wraps.
1. Sautéing Garlic: Mince several cloves of garlic. The amount can be adjusted based on your preference for garlic intensity. In a small saucepan or skillet, heat a tablespoon of olive oil over medium heat.
2. Importance of Timing: Add the minced garlic to the pan and sauté it gently. Be careful not to burn the garlic, as this can lead to a bitter taste. Stir frequently for about 1-2 minutes until the garlic becomes fragrant and lightly golden.
3. Combining with Chicken: Once the chicken has finished resting, dice or shred it into bite-sized pieces. Add the sautéed garlic to the chicken, ensuring that the flavor is evenly distributed.
Shredding or Chopping the Chicken
For the best texture in your wraps, shredding the chicken is preferred. This method not only allows for better distribution of flavors but also makes it easier to wrap everything together.
1. Shredding Techniques: You can use two forks to shred the chicken easily. Hold one fork in each hand and pull the chicken apart. Alternatively, you can use a stand mixer with a paddle attachment to shred the chicken quickly.
2. Why Shredding is Preferred: Shredded chicken provides a better texture in the wraps, allowing for a more cohesive filling that’s easy to bite into without everything falling out.
Combining Ingredients
With the chicken prepared and the garlic mixture ready, it’s time to bring everything together.
1. Mixing with Cheeses: In a large bowl, combine the shredded chicken with the sautéed garlic and generous amounts of both cheddar and mozzarella cheese. The heat from the chicken will begin to melt the cheese slightly, enhancing the overall creaminess of the filling.
2. Adding Spinach: Fold in fresh spinach leaves to the mixture. The warmth from the chicken will slightly wilt the spinach, making it easier to incorporate into the filling without losing its vibrant color and nutrients.
3. Optional Additions: If you’re using ranch dressing or any other optional ingredients, mix them in at this stage. This will ensure that every bite is flavorful and well-balanced.
Once your filling is ready, you’re on your way to assembling the wraps. This process will be explored in the next section, where we’ll cover how to wrap and cook the Cheesy Garlic Chicken Wraps to perfection.
Balancing Flavors and Textures in the Filling
Creating the perfect filling for your Cheesy Garlic Chicken Wraps is crucial for achieving a harmonious blend of flavors and textures. Start by ensuring that the chicken is seasoned well; using garlic powder, paprika, and a hint of cayenne can elevate the dish. When incorporating vegetables, consider using a mix of bell peppers, onions, and spinach. These not only add a splash of color but also contribute varied textures that complement the creamy cheese.
To balance the richness of the cheese and the savoriness of the chicken, add a splash of acidity. A squeeze of fresh lemon juice or a dash of vinegar can brighten the filling and enhance the overall flavor profile. Remember, the goal is to create a filling that is not only delicious but also has a delightful crunch and creaminess.
Importance of Mixing Well for Even Distribution
Once you’ve prepared your ingredients, it’s essential to mix them thoroughly. This ensures that each bite of your Cheesy Garlic Chicken Wrap delivers a consistent flavor experience. Use a large bowl to combine the cooked chicken, sautéed vegetables, and cheese. Make sure to break the cheese into small pieces or shred it so that it distributes evenly throughout the filling. By mixing well, you’ll avoid pockets of blandness and guarantee that the creamy garlic flavor is present in every bite of your wrap.
—
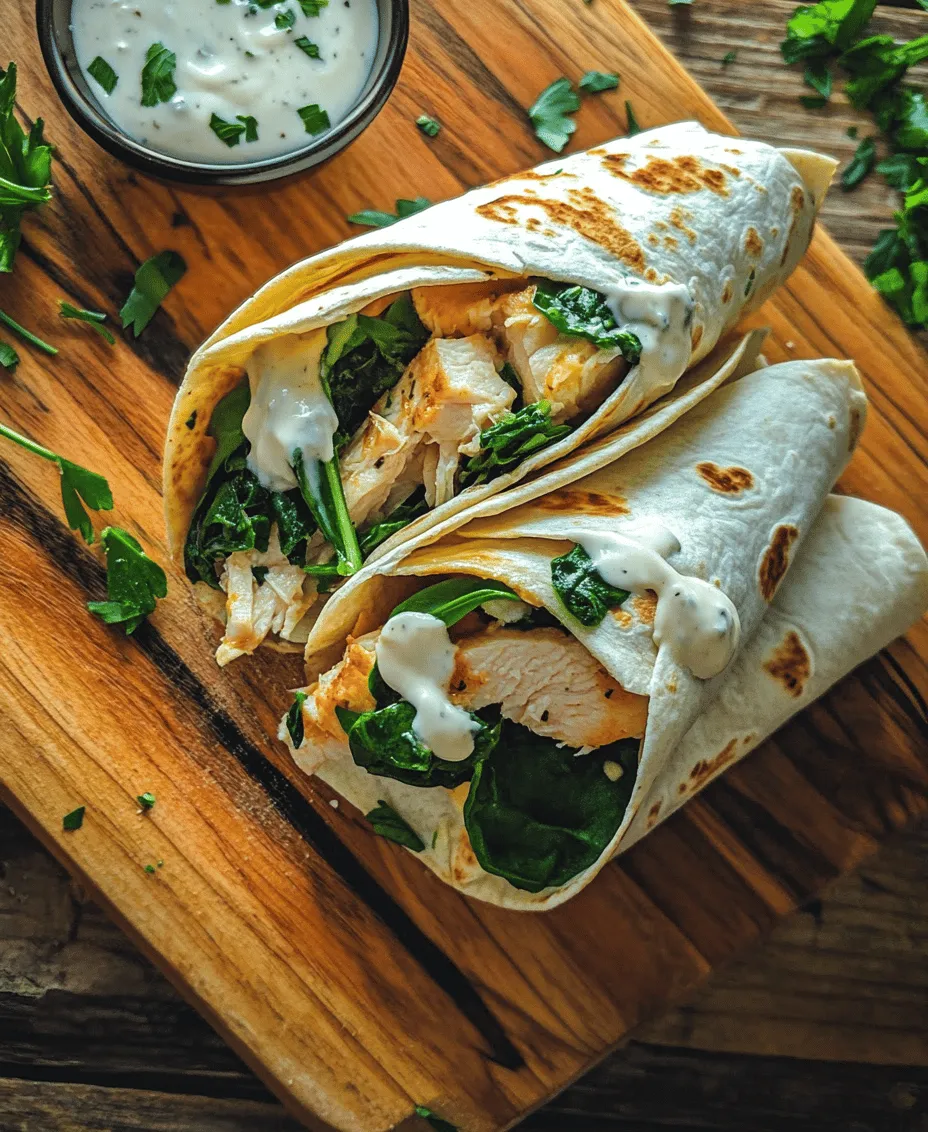
Assembling and Cooking the Wraps
Step-by-Step Instructions for Wrapping
1. Prepare Your Workspace: Clear a clean surface to lay out your tortillas. This could be a cutting board or a clean countertop.
2. Warm the Tortillas: Gently heat your tortillas in a dry skillet for about 30 seconds on each side. This makes them pliable and easier to wrap without tearing.
3. Lay the Filling: Place a generous scoop of the chicken and cheese filling in the center of each tortilla. Be careful not to overfill, as this can make it difficult to wrap.
4. Fold the Sides: Start by folding the sides of the tortilla inward over the filling. This helps to contain the filling as you roll.
5. Roll It Up: Starting from the bottom, carefully roll the tortilla upwards, tucking the filling in as you go. Keep the wrap tight but not too tight to prevent the tortilla from tearing.
6. Seal the Edges: Once fully rolled, you can secure the wrap with a toothpick or place it seam-side down on your cooking surface.
Visualizing the Assembly Process
Visualizing the assembly process can be incredibly helpful. Picture the tortilla as a canvas, where the filling is a masterpiece waiting to be wrapped. As you lay down the filling, imagine how the flavors will meld together. The edges being folded inward represent the protection of the delicious contents within, while the rolling motion symbolizes the anticipation of enjoying this culinary creation. A step-by-step photo guide or video can also be beneficial for visual learners.
Tips for Keeping Fillings Secure
To ensure that your wraps stay tightly packed during cooking, consider these tips:
– Don’t Overfill: Generally, a quarter to a half cup of filling per wrap is sufficient. Overfilling leads to messy wraps.
– Use a Sturdy Tortilla: Opt for larger, thicker tortillas that can hold up to the weight of the filling.
– Cheese as a Glue: Cheese not only adds flavor but also helps to keep the wraps intact. If you’re concerned about the wraps coming apart, sprinkle some extra cheese on the edges before sealing.
Cooking Techniques
When it comes to cooking your Cheesy Garlic Chicken Wraps, you have two great options: pan-frying and baking.
Benefits of Pan-Frying vs. Baking Wraps
– Pan-Frying: This technique gives your wraps a beautiful golden-brown exterior and a satisfying crunch. Heat a bit of oil in a skillet over medium heat and cook the wraps seam-side down for about 4-5 minutes on each side, or until golden. This method also allows for a quick cooking time, making it ideal for busy weeknights.
– Baking: For a healthier option, you can bake the wraps. Preheat your oven to 400°F (200°C) and place the assembled wraps seam-side down on a baking sheet. Lightly brush them with oil or melted butter for a crispy finish and bake for 15-20 minutes, or until the tops are golden and the cheese is melted. This method is great for making larger batches without the need for constant supervision.
How to Achieve Golden, Crispy Exteriors While Melting Cheese
To ensure that the cheese melts perfectly while achieving a crispy exterior, follow these tips:
1. Preheat Your Cooking Surface: Whether you’re using a skillet or oven, make sure it’s preheated. This helps to create that crispy texture right from the start.
2. Use a Lid When Pan-Frying: If you’re pan-frying, cover the skillet with a lid for the first few minutes. This traps steam and helps the cheese melt while the outside crisps up.
3. Monitor Cooking Time: Keep an eye on the wraps as they cook, turning them periodically to achieve even browning.
—
Serving Suggestions
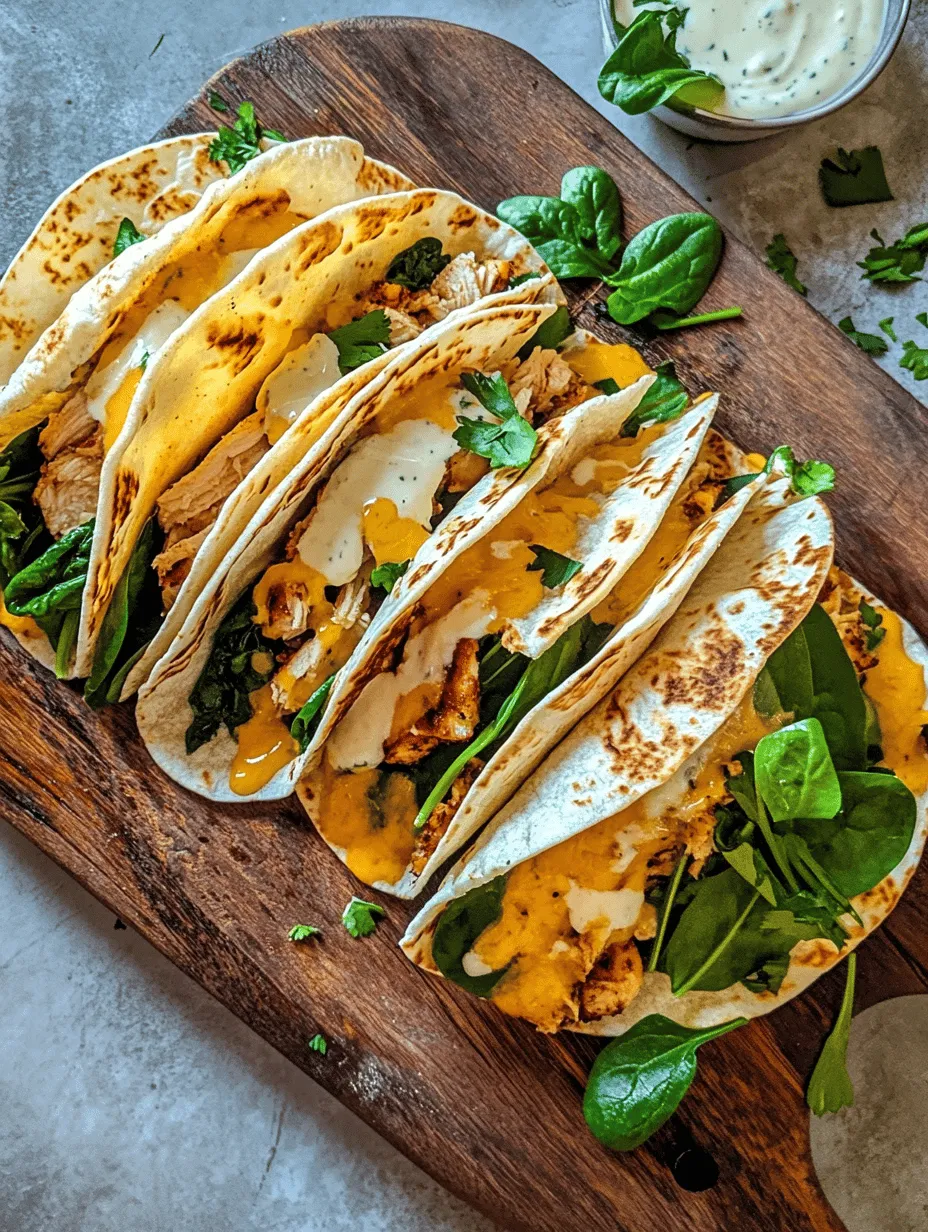
Presentation plays a vital role in enhancing the dining experience for your Cheesy Garlic Chicken Wraps. Here are some ideas to make your wraps not only delicious but visually appealing:
– Plating Ideas: Serve your wraps on a large platter, cut in half to reveal the gooey cheese and colorful filling. Arrange them with a side of dipping sauce, such as ranch or spicy mayo, for a delightful contrast.
– Incorporating Garnishes: A sprinkle of fresh parsley or cilantro on top adds a pop of color and freshness to your meal. Consider adding a few cherry tomatoes or a side salad for a nutritious accompaniment.
– Suggestions for Side Dishes or Accompaniments: Pair your wraps with a side of sweet potato fries, a light coleslaw, or a refreshing cucumber salad. These sides can complement the richness of the wraps while providing a textural contrast.
Variations and Customizations
One of the best aspects of Cheesy Garlic Chicken Wraps is their versatility. Feel free to explore different ingredients and adapt the recipe to suit your tastes or dietary needs:
– Cheese Variations: While mozzarella and cheddar are popular choices, try swapping them for pepper jack for a spicy kick or feta for a tangy flavor.
– Vegetable Additions: Experiment with seasonal vegetables such as zucchini, mushrooms, or even roasted red peppers. Each addition will bring a unique taste and texture to your wraps.
– Sauce Options: Elevate your wraps with sauces like a spicy sriracha mayo, tangy barbecue sauce, or a creamy garlic aioli for added flavor.
– Dietary Adaptations: For vegetarian options, substitute the chicken with chickpeas, tofu, or roasted vegetables, ensuring you maintain a good balance of protein and flavor.
—
Nutritional Information
Understanding the nutritional profile of your Cheesy Garlic Chicken Wraps can help you make informed decisions about your meal. Here’s a general breakdown per serving (assuming two wraps):
– Calories: Approximately 450-600 calories (depending on the filling and cooking method)
– Protein: 30-40 grams
– Fats: 20-30 grams (with the majority coming from cheese and oil)
– Carbohydrates: 40-50 grams (primarily from the tortillas)
Discussion of Health Benefits Provided by Key Ingredients
– Chicken: A great source of lean protein, aiding in muscle growth and repair.
– Cheese: Provides calcium for bone health and can be a good source of protein.
– Vegetables: Adding a variety of vegetables increases fiber content, essential for digestion and overall health.
Suggestions for Making the Dish Healthier or Lighter
To lighten up your wraps, consider the following adjustments:
– Opt for Whole Wheat Tortillas: These provide more fiber and nutrients compared to regular tortillas.
– Reduce Cheese: Use less cheese or opt for lower-fat cheese varieties to decrease calorie content.
– Increase Veggie Proportion: Fill your wraps with more vegetables to enhance flavor while reducing calories.
—
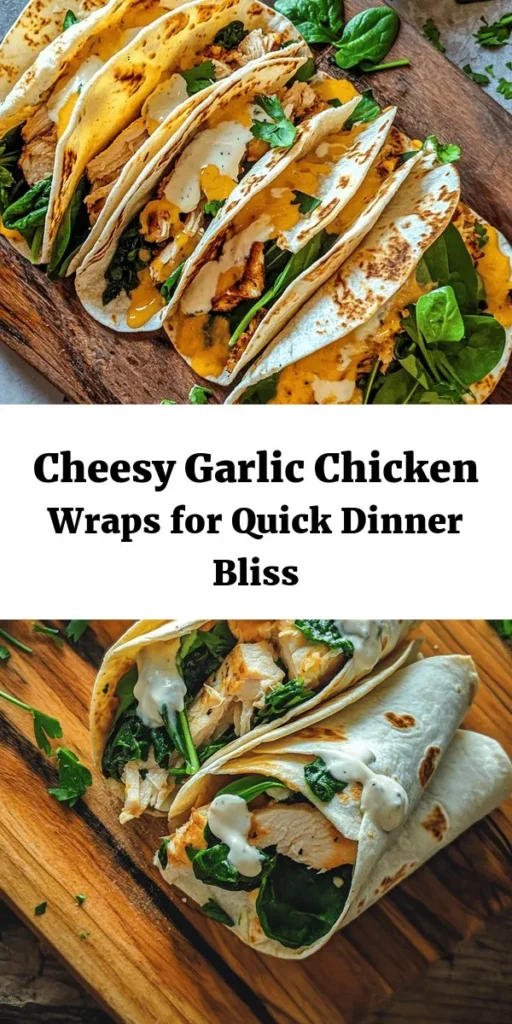
Conclusion
Cheesy Garlic Chicken Wraps are not just a meal; they are a delightful culinary adventure that brings together irresistible flavors and textures. The versatility of this dish allows you to customize it to suit any occasion or preference, making it a perfect addition to your recipe repertoire.
Whether you’re cooking for family, friends, or simply treating yourself, this recipe is sure to impress. So, gather your ingredients and give it a try at home. The joy of cooking and sharing meals with loved ones is something truly special, and these wraps are a fantastic way to spread that joy. Happy cooking!